Xero Integration
ShiftCare HR connects to Xero Payroll so employee master data, leave requests, and payslips stay in sync between both systems. This page covers connecting Xero, mapping leave types, monitoring sync health, syncing individual records, viewing payslips, and disconnecting.
Connect to Xero
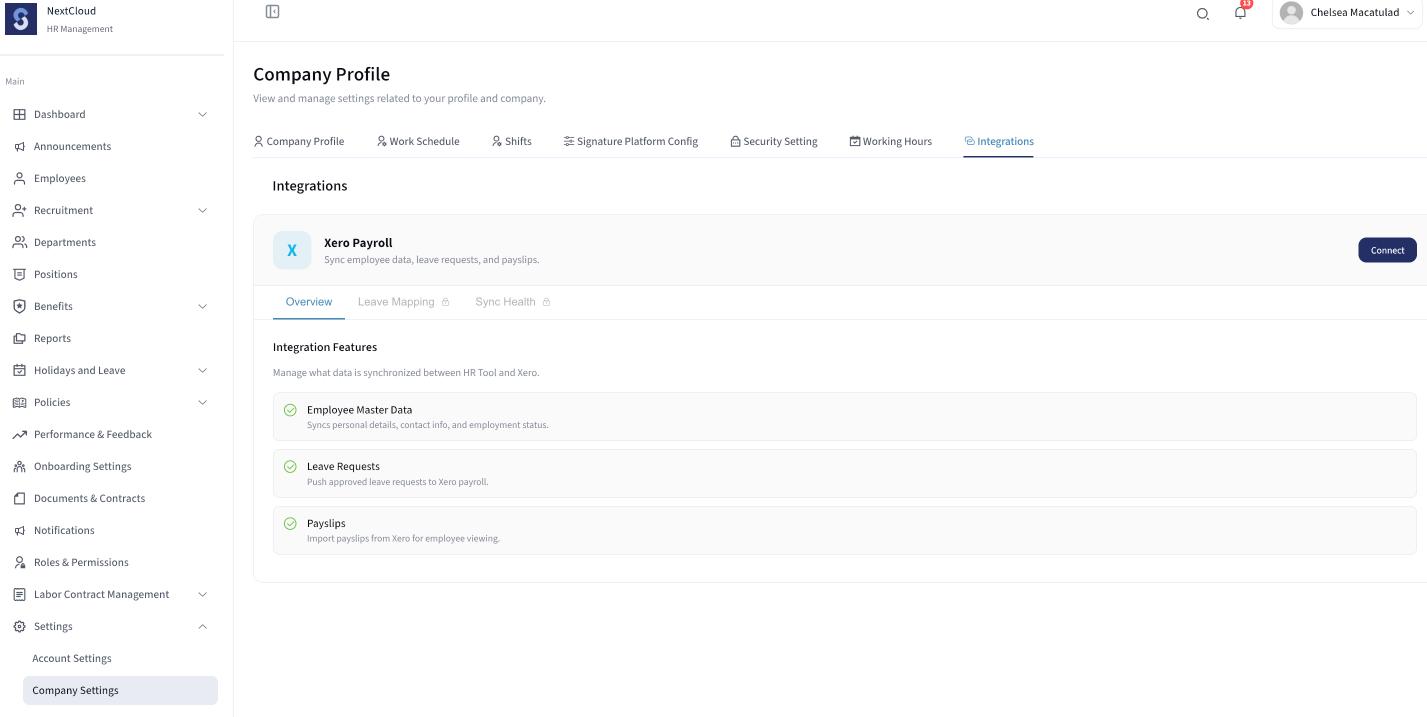
- Go to Company Settings → Integrations.
- Click Connect on the Xero Payroll card.
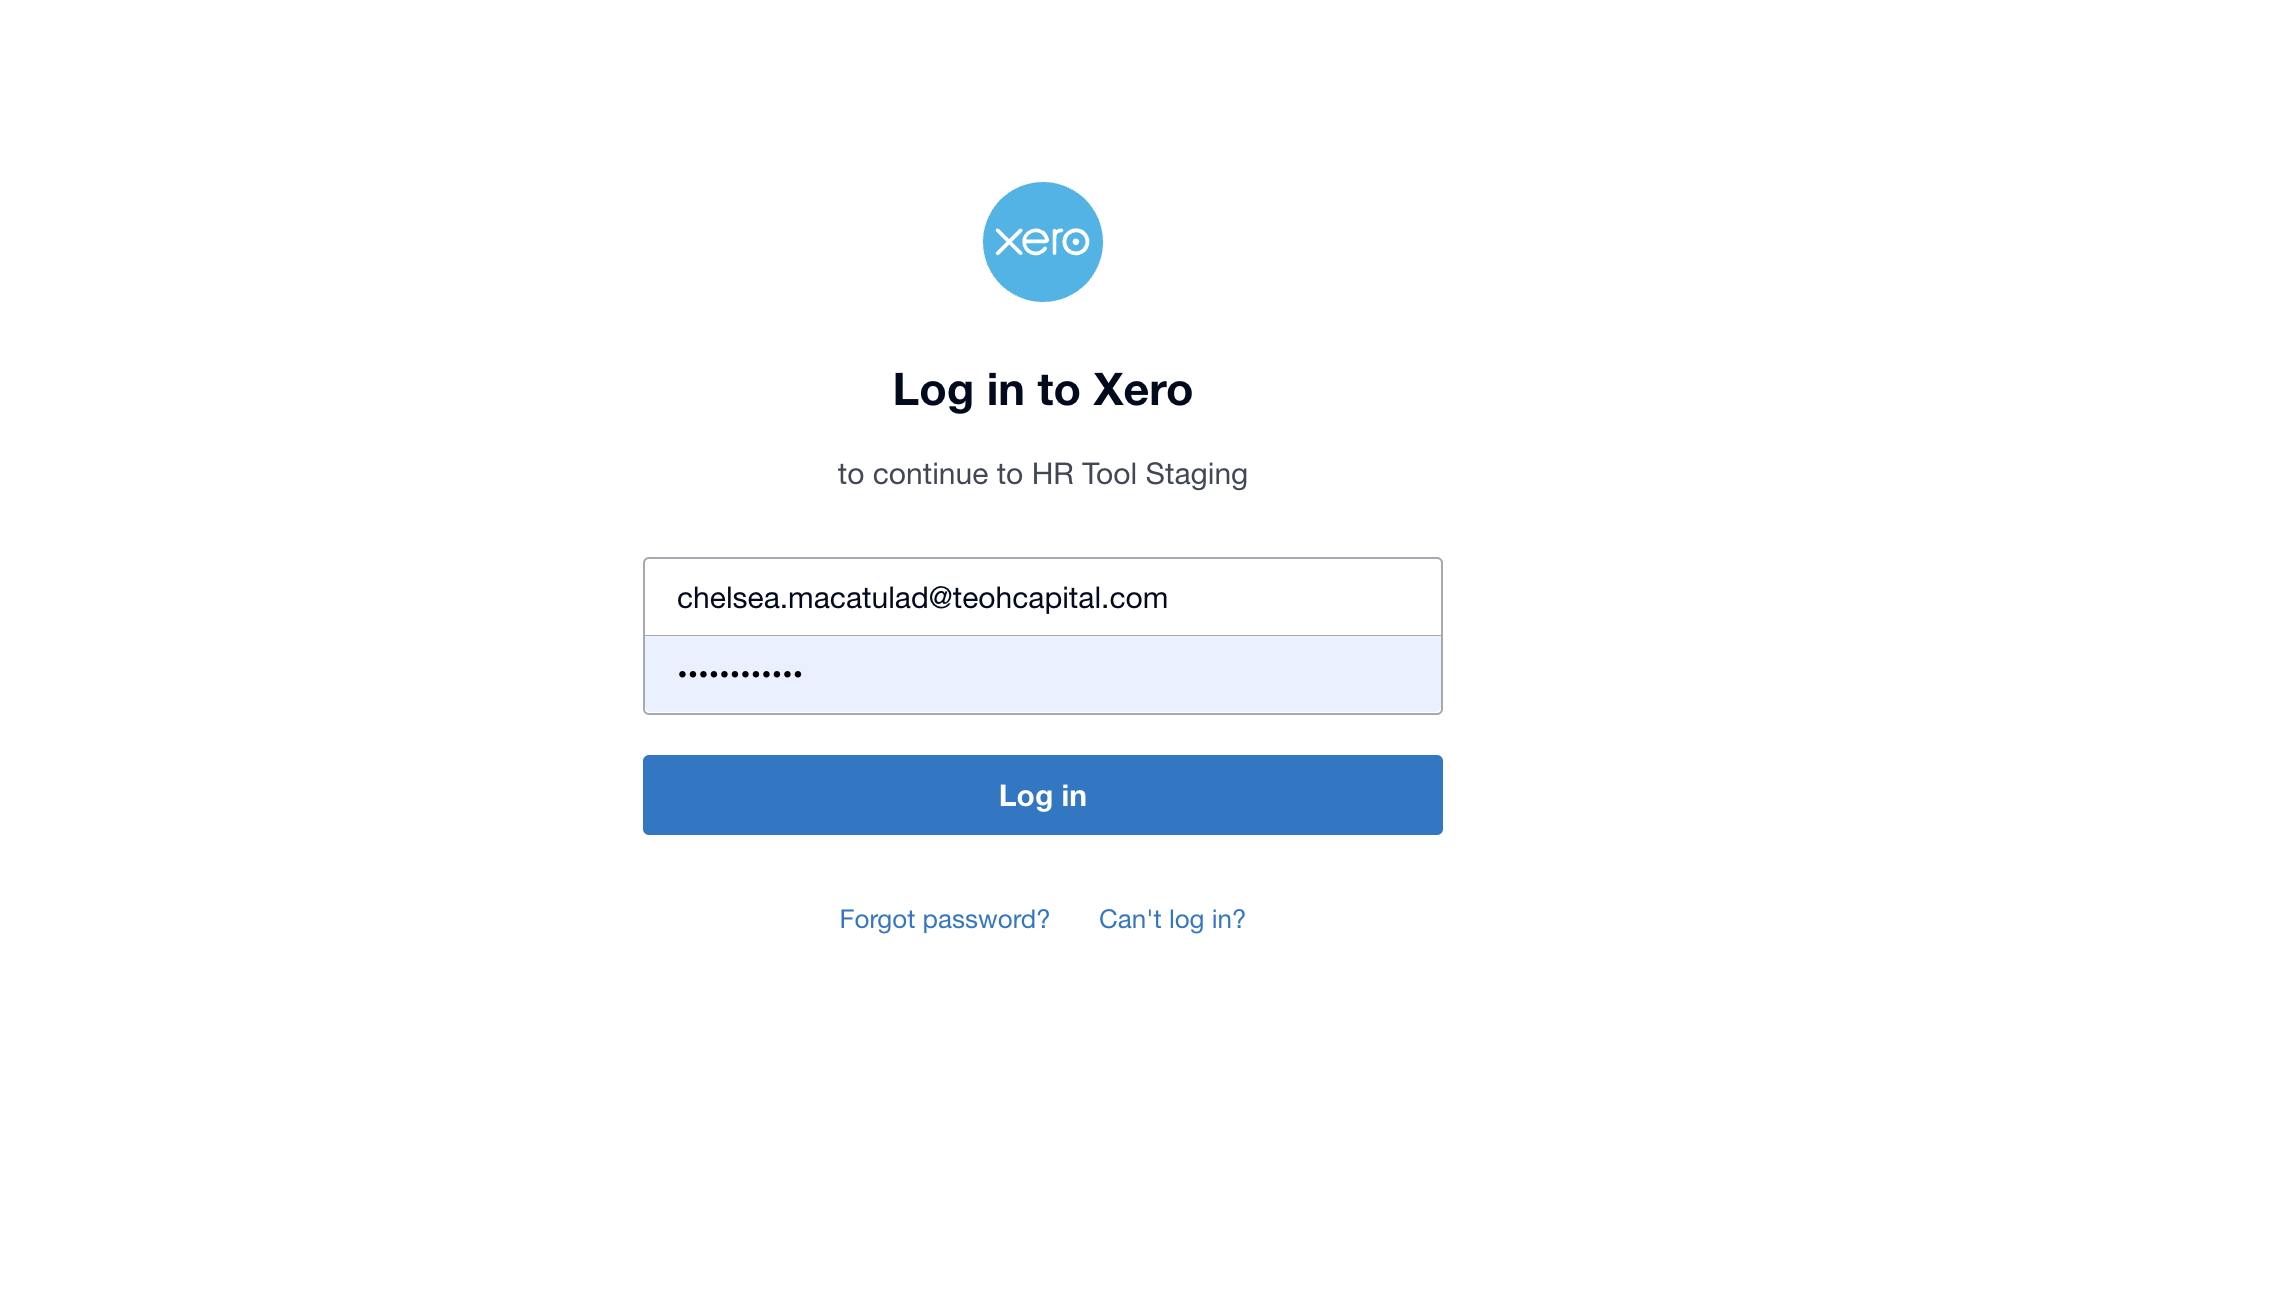
- Sign in to Xero in the login window that appears.
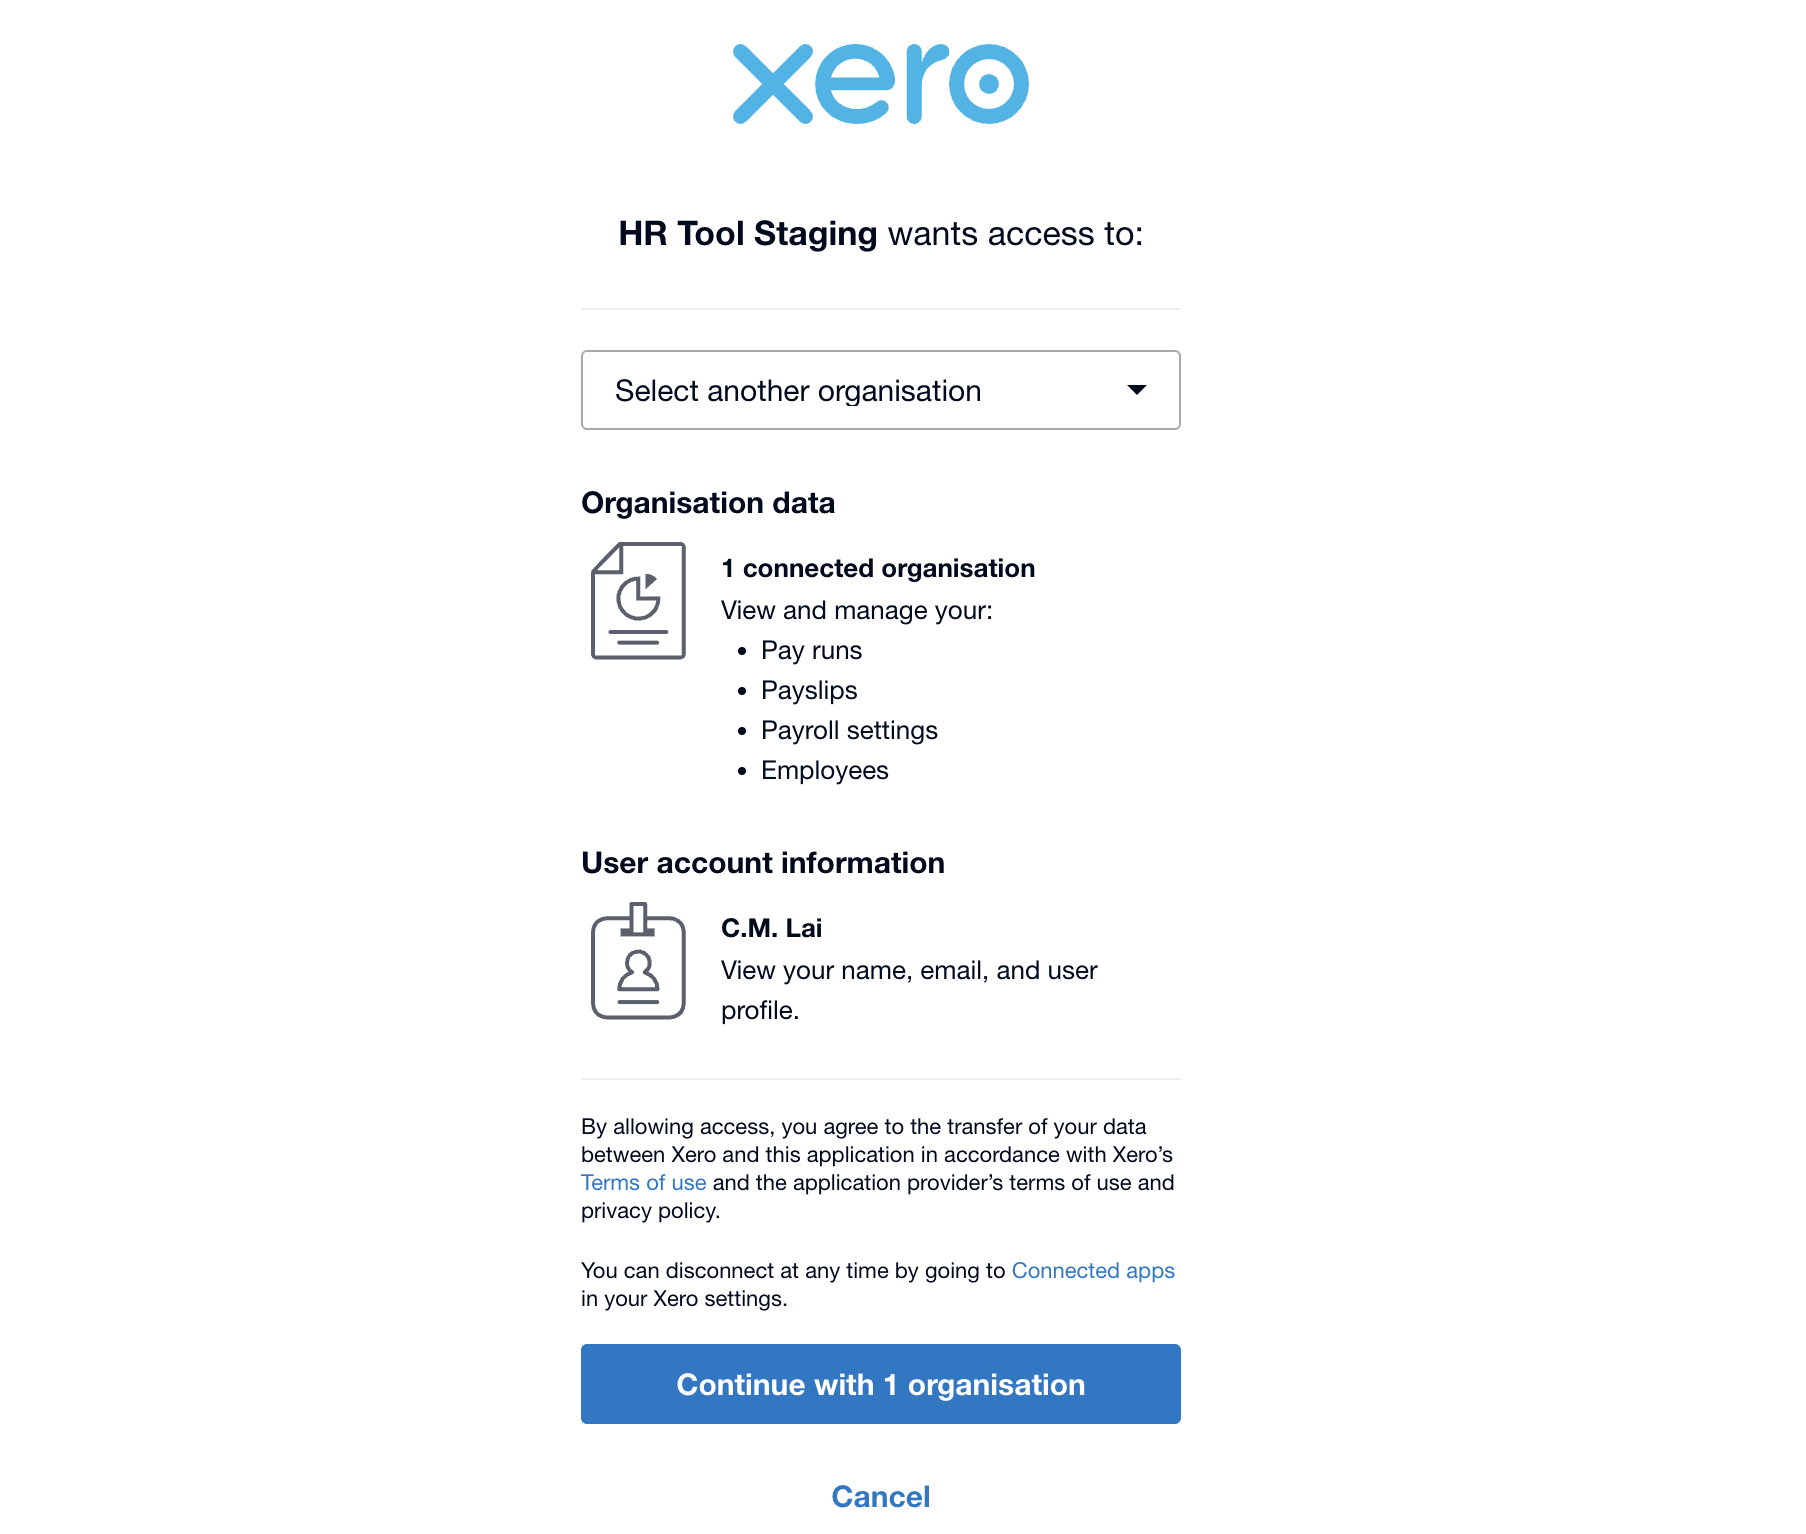
- Select your organisation and click Allow Access.
- Wait for the sync progress bar to complete.
- The card shows a green Connected badge when done.
The Leave Mapping and Sync Health tabs stay greyed out until Xero is connected. Hovering a locked tab shows a Connect Xero first hint. Only the Overview tab is available beforehand.
Overview Tab
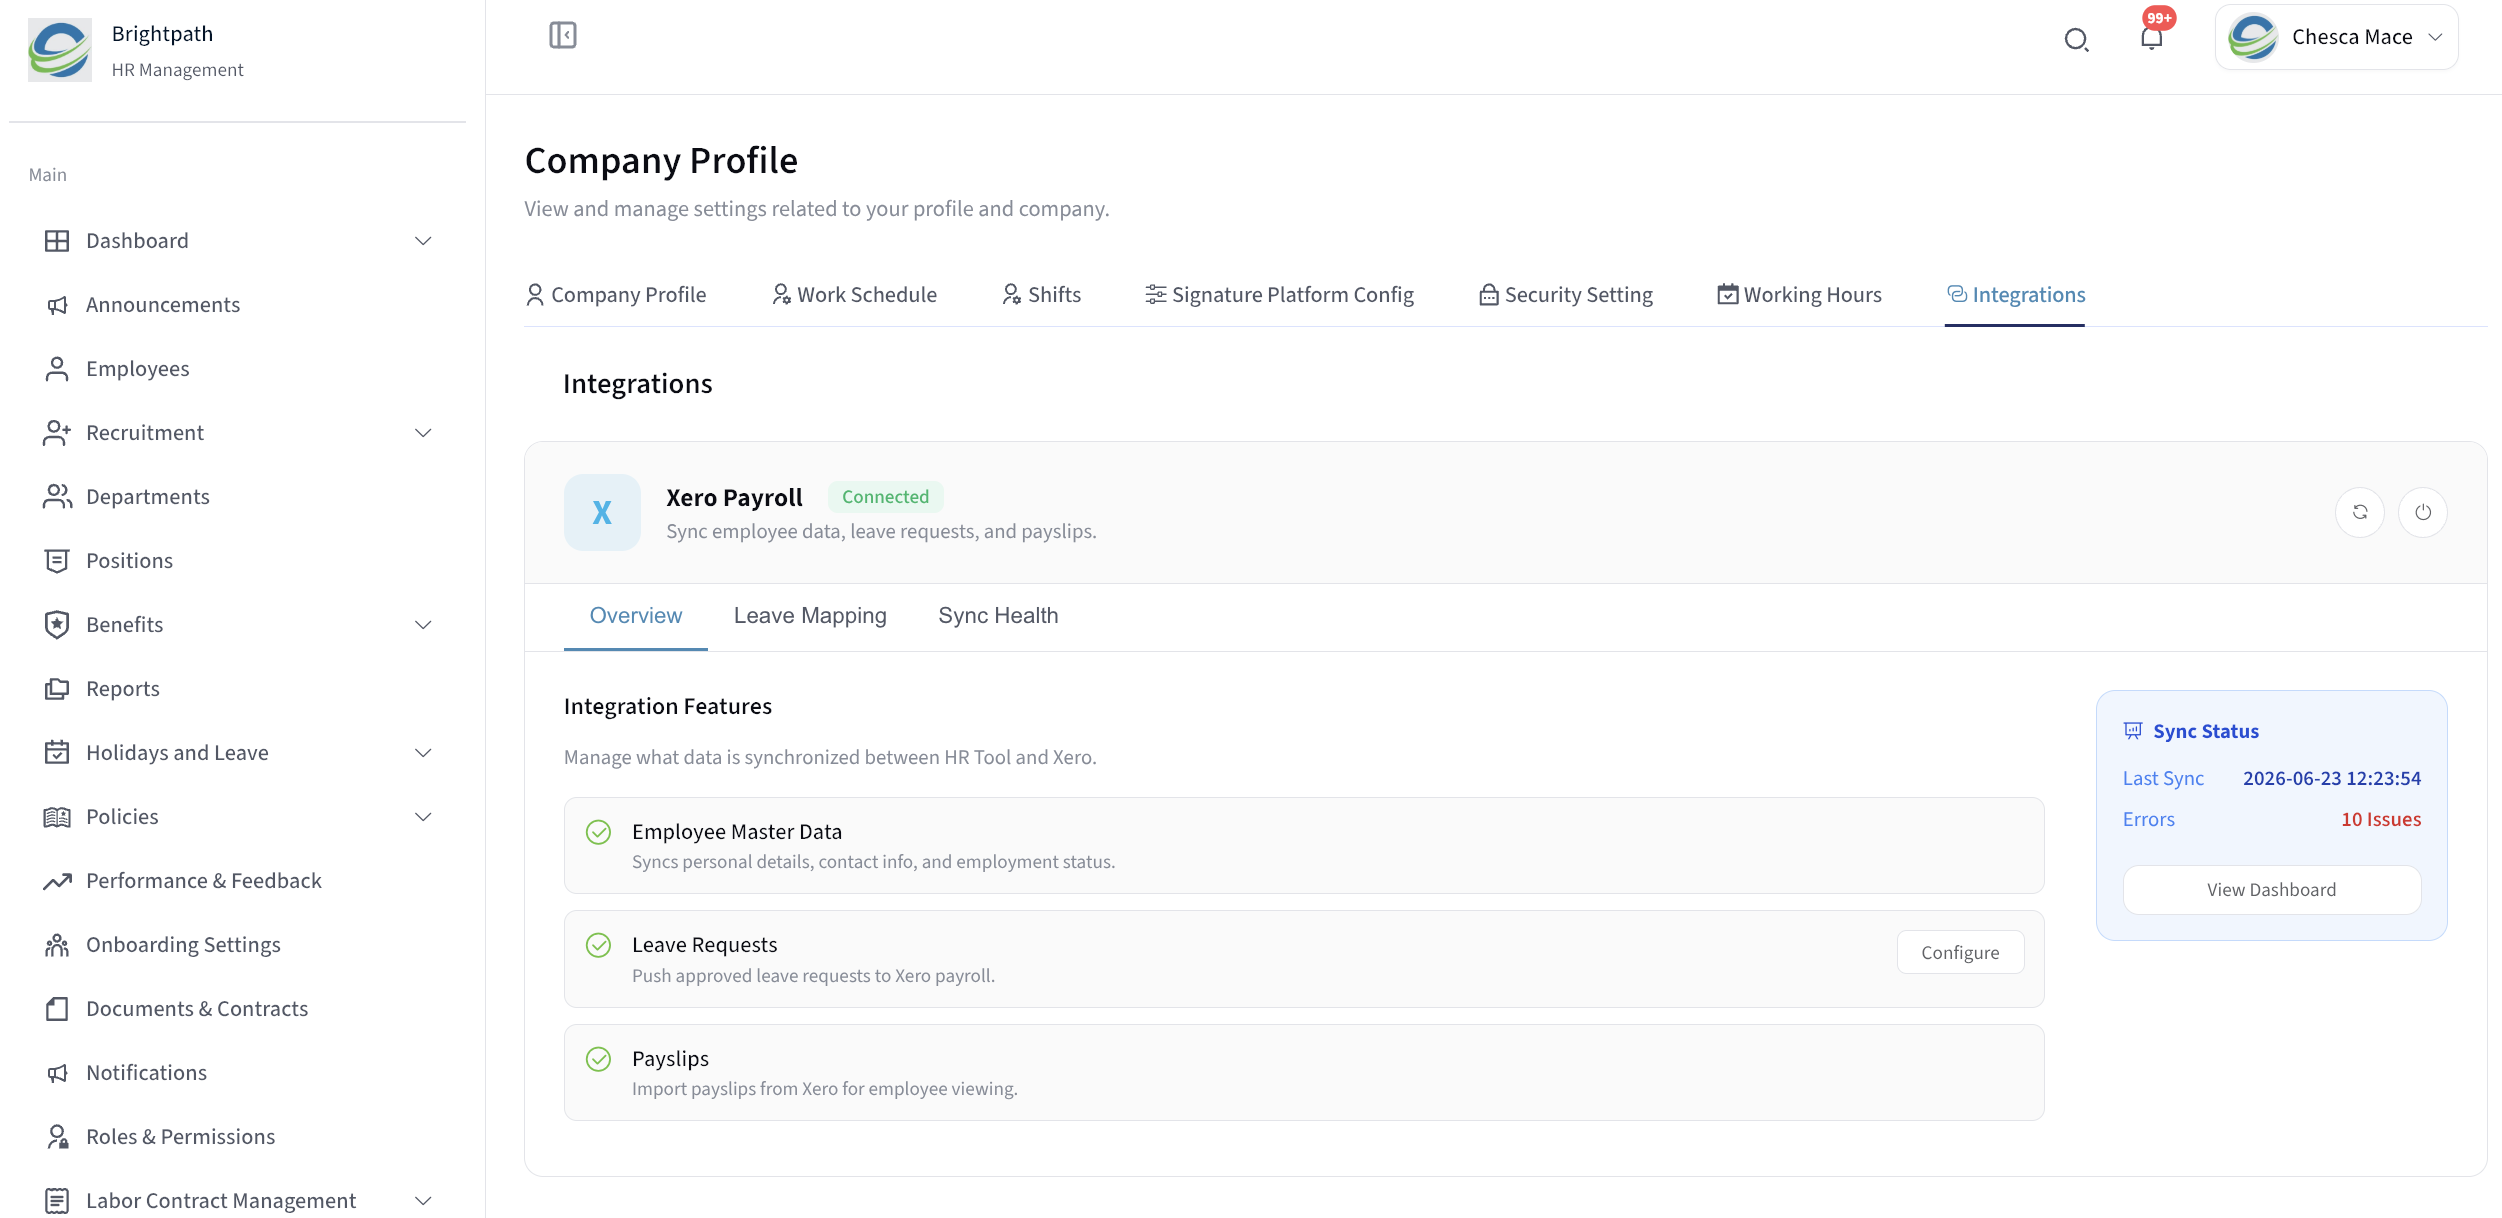
- Employee Master Data, Leave Requests, and Payslips are synced.
- The Sync Status card (right side) shows the last sync time and error count.
- Click View Dashboard to jump to the Sync Health tab.
Leave Mapping Tab
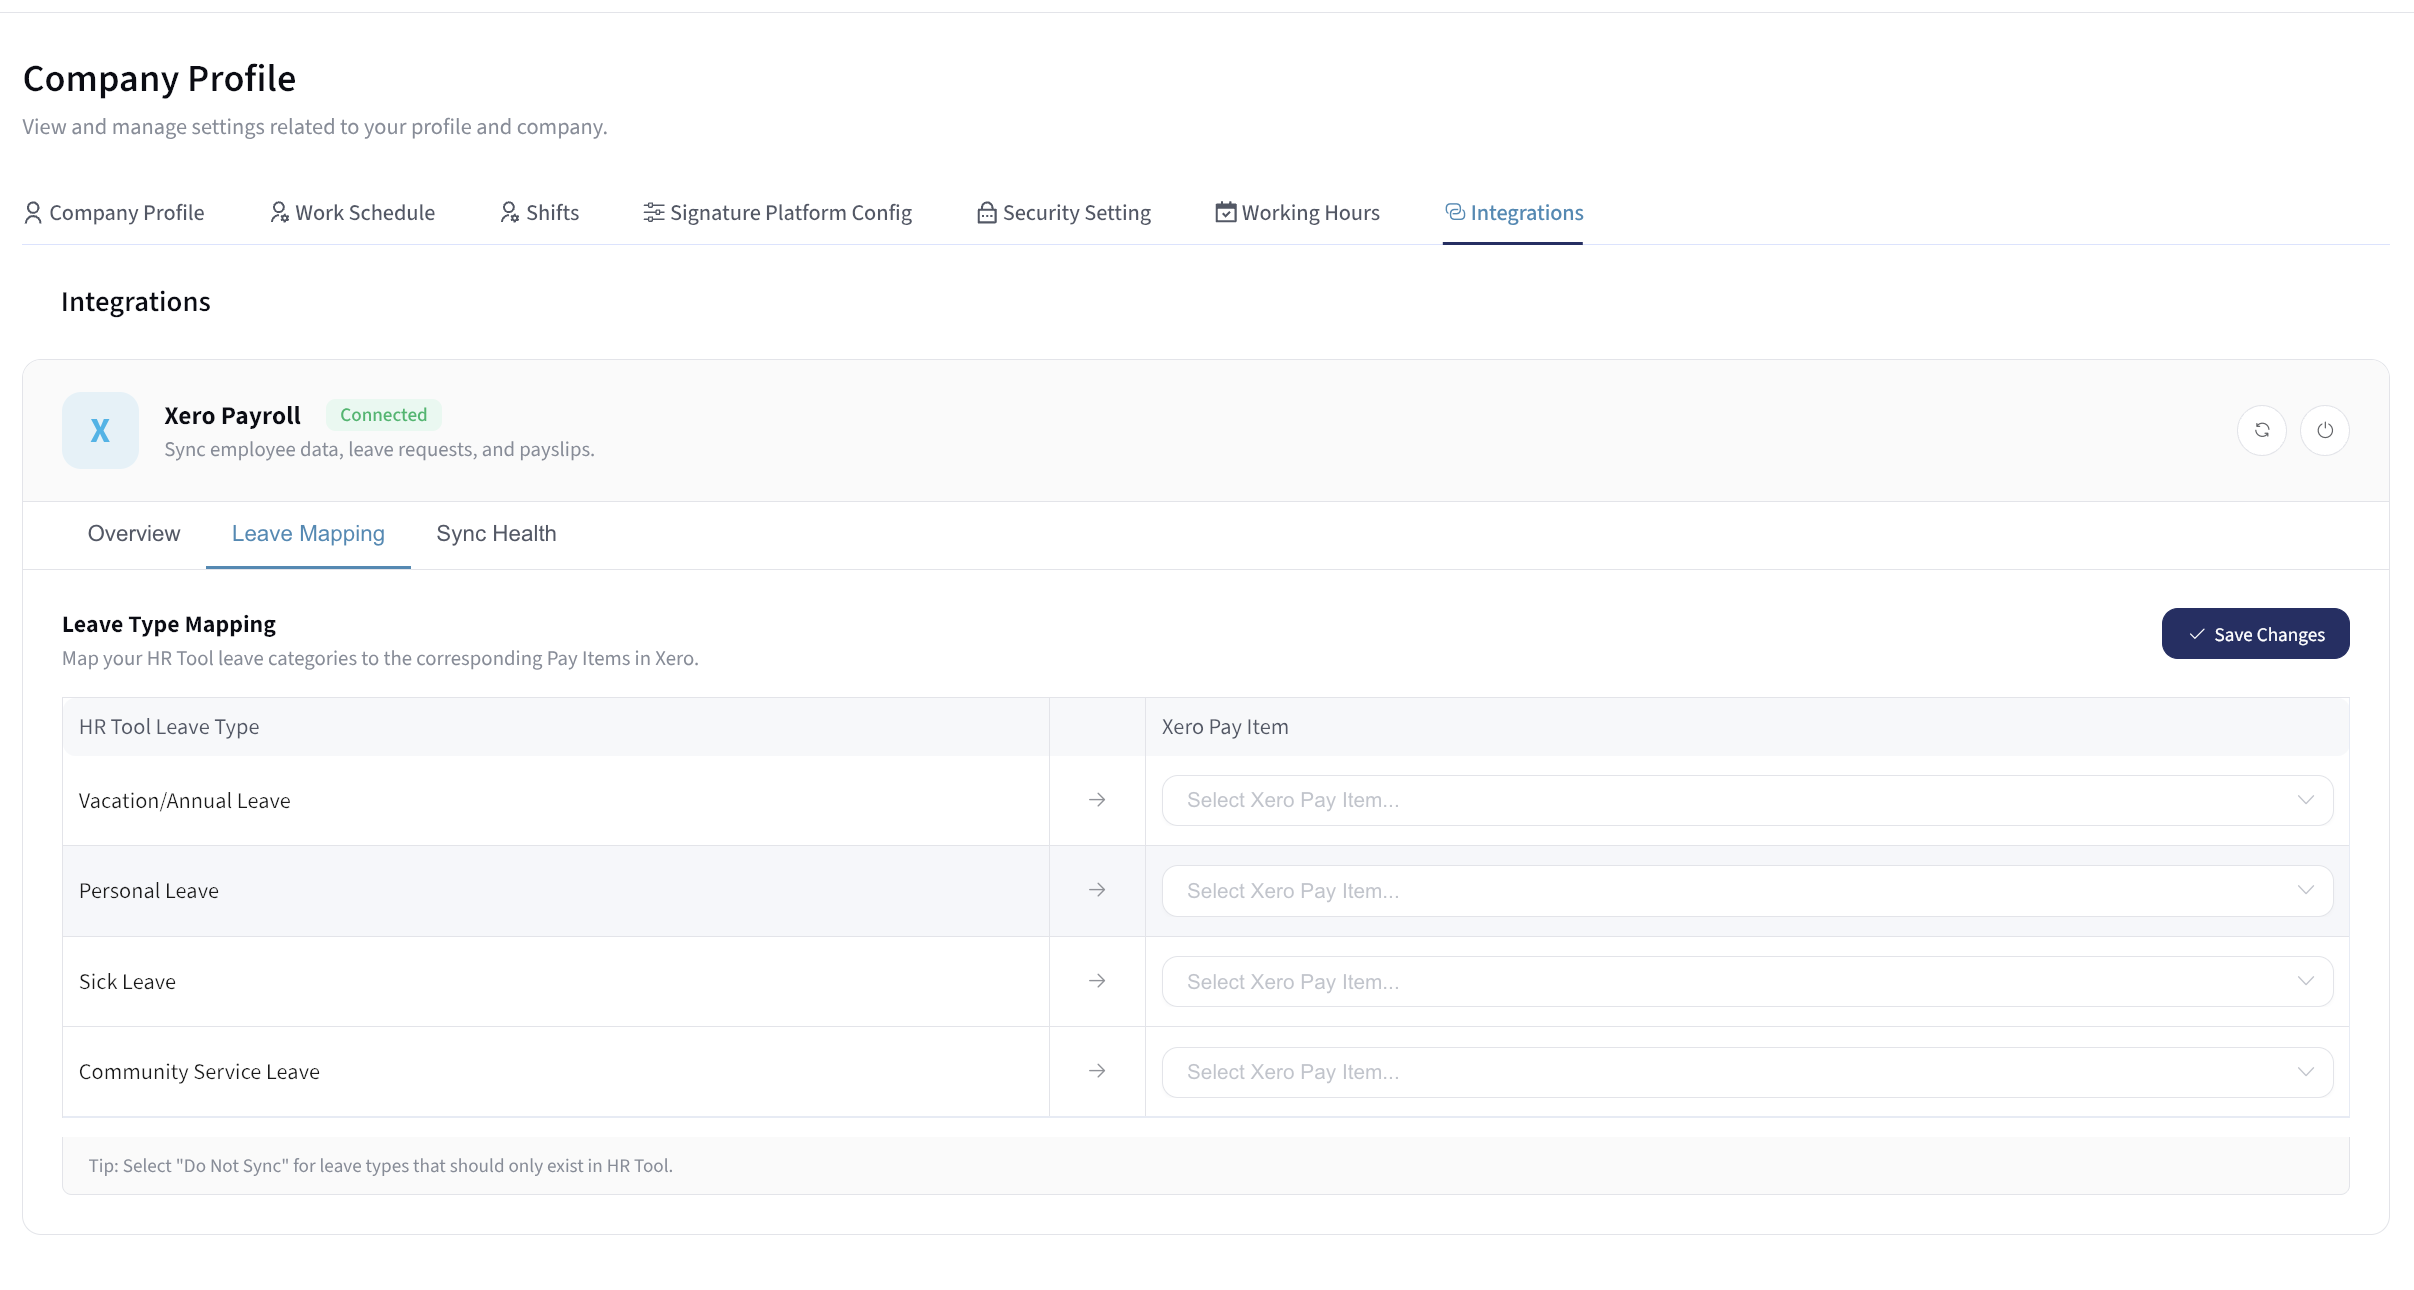
- Open the Leave Mapping tab (available after connecting).
- For each HR leave type, select the matching Xero Pay Item from the dropdown.
- Leave types that should not sync to Xero can be left blank or set to Do Not Sync.
- Click Save Changes. A green alert confirms the save.
Sync Health Tab
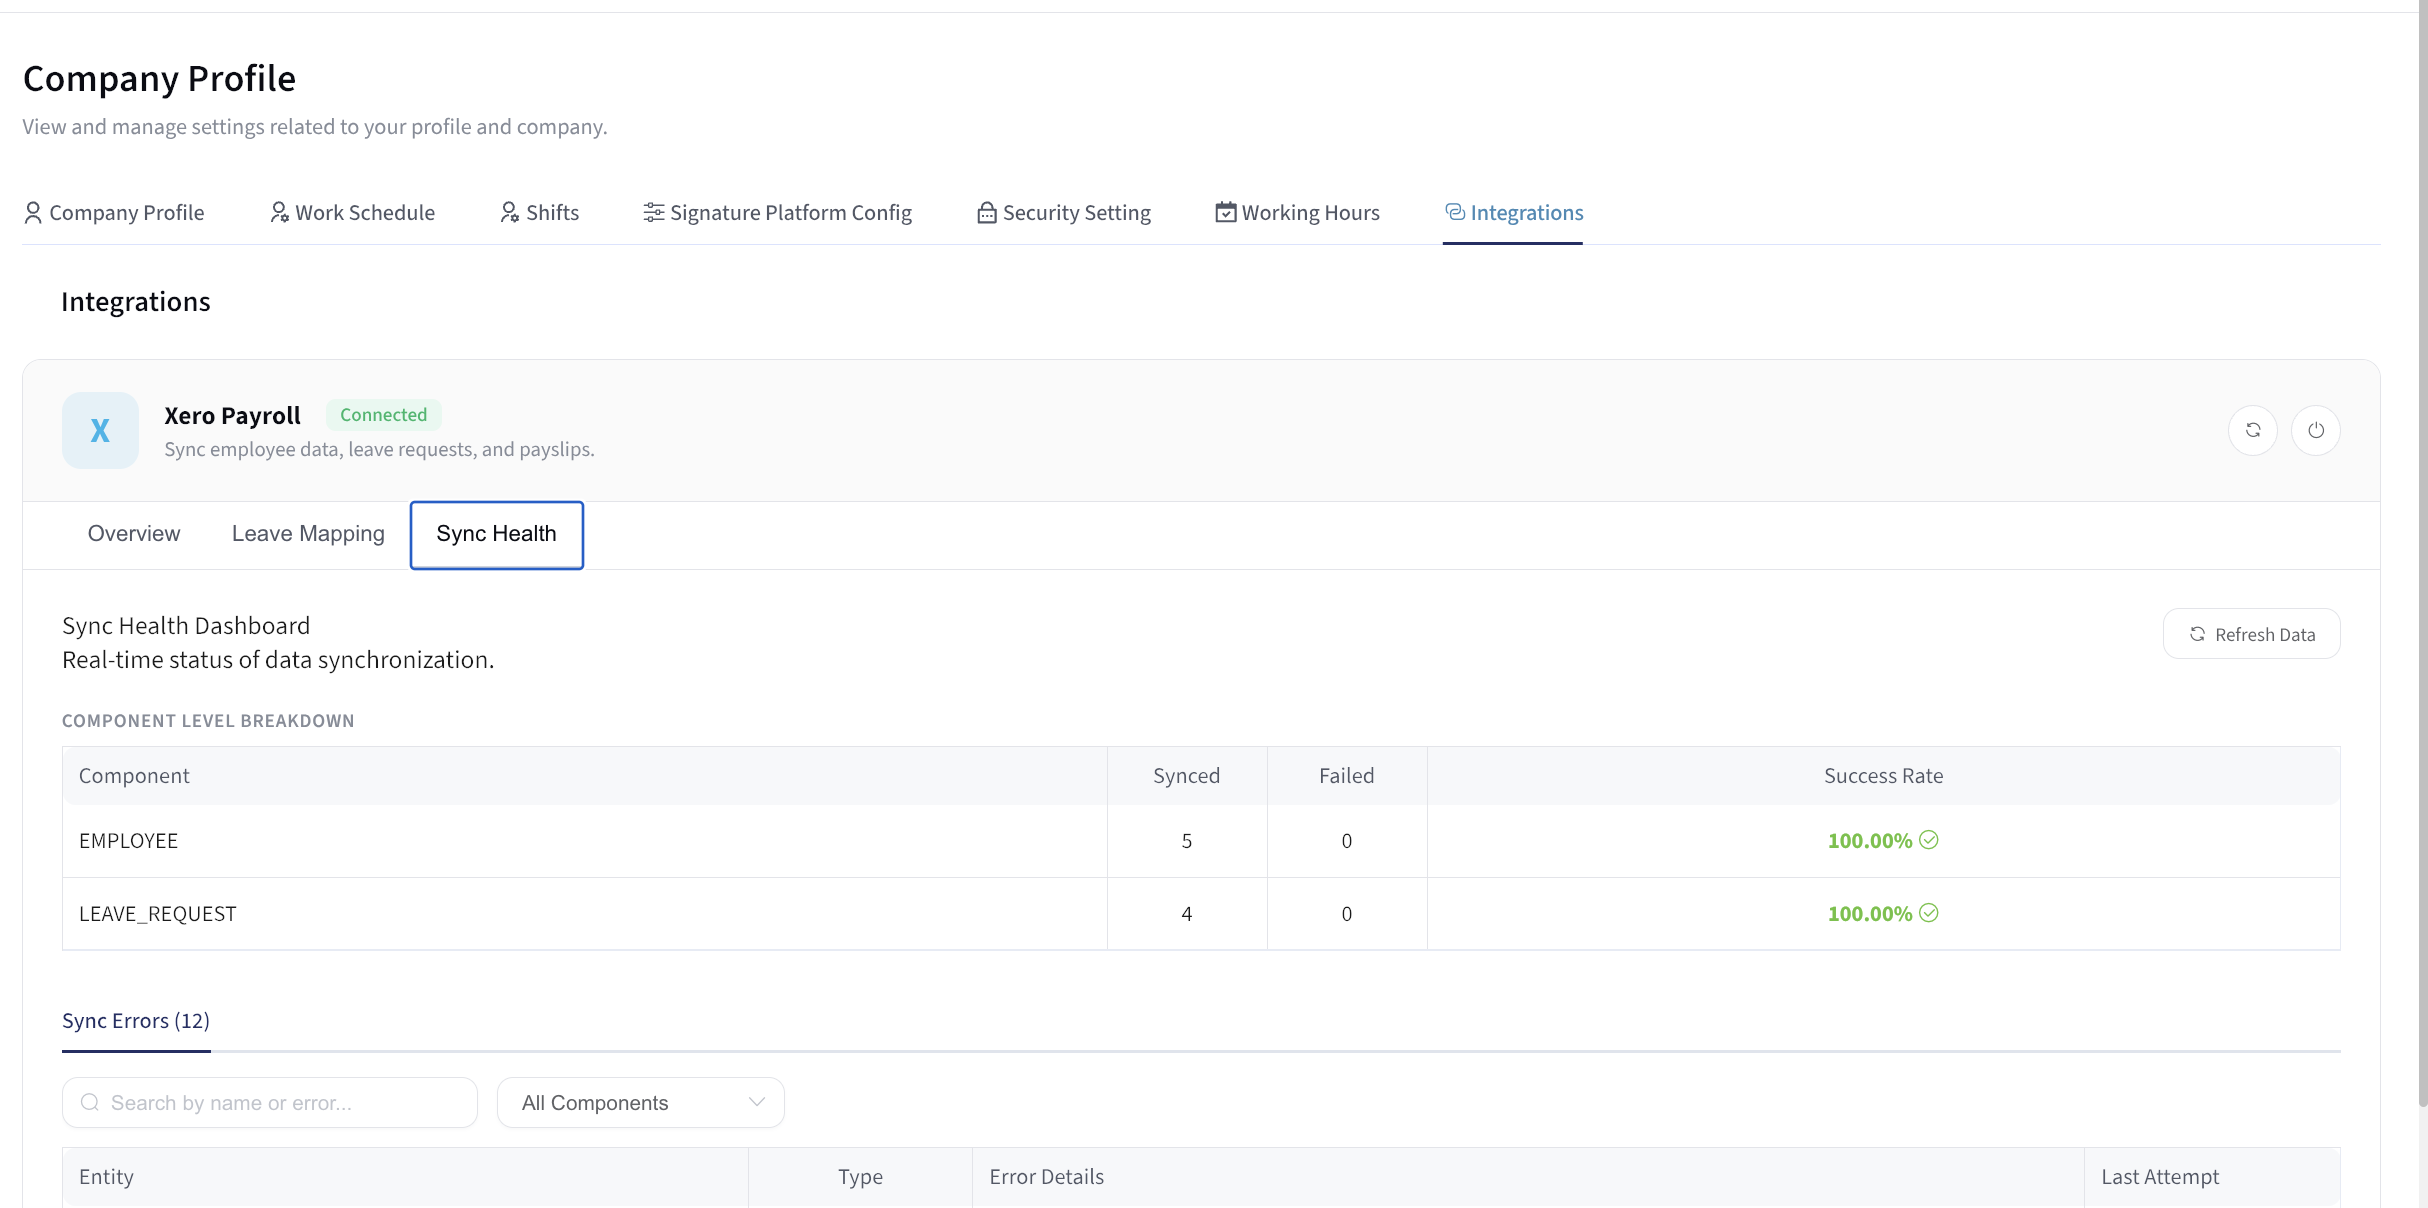
The breakdown table shows Synced / Failed counts and success rate per component.
- Success rate ≥ 95% is shown in green; below 95% shows a warning.
- The Sync Errors panel lists individual failed records with error details.
- Use the search box or component filter to narrow down errors.
- Click Refresh Data to reload the latest status from the server.
Manual Sync
Click the ↻ (Sync Now) icon in the card header.
- The icon shows a loading spinner while syncing.
- The Last Sync timestamp in the Overview tab updates when complete.
This syncs everything at once. To push a single employee or a single leave request, use the per-record options below.
Sync a Single Employee
You can push one employee to Xero from their profile, without running a full sync.
Go to Employee Management, open the employee, and look at the badge row in the profile header.
The badge only appears when Xero is connected. It shows one of four states:
| Badge | Meaning |
|---|---|
| ✓ Xero Synced | The employee has been pushed to Xero successfully. |
| ⏳ Xero Syncing... | A sync is in progress. |
| ✗ Xero Sync Failed | The last attempt failed. |
| ⚠ Xero Not Synced | The employee has never been pushed to Xero. |
To sync:
- Click the badge. Hovering it first shows what the click will do — Click to sync to Xero, Click to re-sync to Xero, or Sync failed. Click to retry.
- A Xero Sync confirmation appears. For an employee who has never synced it reads "Confirm manual sync to Xero for this employee?"; for one already synced it reads "This employee has already been synced to Xero. Do you want to re-sync?"
- Click Confirm, or Cancel to abort.
- A Xero sync initiated successfully message appears. The badge switches to Xero Syncing... and the profile refreshes a couple of seconds later with the final result.
The badge is clickable in every state, including Xero Synced — use it to re-push an employee after correcting their pay or tax details. Re-syncing never overwrites pay items you've already configured for the employee in Xero — allowance, overtime, and other earnings lines stay untouched.
Sync a Single Leave Request
Approved leave can be pushed to Xero individually from the leave list.
Go to Leave Management and find the request in the list. When Xero is connected, each row gains a Xero sync tag.
| Tag | Meaning |
|---|---|
| Xero ✓ | The leave request synced successfully. |
| Xero ✗ | The last sync attempt failed. |
| Xero — | Not yet synced. |
- Click a tag showing ✗ or —.
- Confirm Sync this leave request to Xero?
- The result appears as Xero sync success or Xero sync failed.
The tag appears only on requests with an Approved status. Pending and rejected requests are never pushed to Xero. Rows already showing ✓ are not clickable — there is nothing left to retry.
Payroll History and Payslips
Payslips are imported from Xero and shown per employee.
Go to Employee Management, open the employee, and select the Pay and Compensation tab. Employees reach the same view themselves under My Profile → Pay and Compensation.
The Payroll History table lists each imported payslip with its pay period, net pay, and Xero status.
- Use the year dropdown to filter to a single year, or clear it to see all.
- Click Refresh to re-pull payslips from Xero.
- Long histories are paginated.
Viewing a payslip
Click View on any row to open the Payslip Details dialog.
The dialog shows the pay period and Xero PayRun ID, followed by:
| Field | Notes |
|---|---|
| Payment Date | Date the pay run was paid. |
| Pay Run Status | See the status table below. |
| Wages | Gross earnings for the period. |
| Tax | Deducted from gross. |
| Superannuation | Deducted from gross. |
| Deductions | Other deductions. |
| Reimbursement | Added to net. |
| Net Pay | Final amount paid. |
Use Back to profile to close the dialog.
Pay run statuses
| Status | Meaning |
|---|---|
| DRAFT | Created in Xero but not yet posted. |
| POSTED | Posted to Xero. |
| VOIDED | Cancelled — the payslip no longer applies. |
| COMPLETED | Fully processed and paid. |
Leave History on the same tab
Below Payroll History, the Leave History table repeats each approved request with a Xero Sync column showing Synced or Error. This is a read-only view — to retry a failed push, use Sync a Single Leave Request.
In the current build, the Xero Status column in the Payroll History table displays Synced for every row regardless of the record's real state. Treat it as a placeholder and confirm the actual status against the Sync Health tab. The Pay Run Status inside the Payslip Details dialog is accurate.
What Gets Synced
Sync activity is recorded against five record types, which are the categories you'll see broken out in the Sync Health tab and its error list:
| Type | Direction | Covers |
|---|---|---|
| Employee | HR → Xero | Employee master data, tax and employment details. |
| Leave Request | HR → Xero | Approved leave requests. |
| Leave Type | HR → Xero | Leave type to Xero pay item mappings. |
| Superfund | HR ↔ Xero | Superannuation fund details. |
| Payslip | Xero → HR | Imported payslips for employee viewing. |
Troubleshooting
| Symptom | What to check |
|---|---|
| Leave Mapping and Sync Health tabs are greyed out | Xero isn't connected. Complete Connect to Xero first. |
| An employee fails to sync repeatedly | Open their profile and confirm tax and employment details are complete, then click the badge to retry. |
| Approved leave shows Xero ✗ | Check that the leave type has a Xero Pay Item mapped on the Leave Mapping Tab. Unmapped types cannot sync. |
| Success rate dropped below 95% | Open Sync Health, filter the Sync Errors panel by component, and work through the individual failures. |
| No payslips appear for an employee | Payslips only import once a pay run exists in Xero. Click Refresh on the Pay and Compensation tab. |
| Sync stopped entirely | Confirm the card still shows Connected — an expired Xero authorisation returns the card to its unconnected state. |
Disconnect
Click the power icon in the card header.
- Confirm by clicking Disconnect in the dialog. Click Cancel to abort.
- The card returns to the unconnected state. No further data will sync.
Disconnecting stops all syncing immediately, including payslip imports. Per-employee and per-leave sync badges disappear from the interface until Xero is reconnected.
- For mapping HR leave types to Xero pay items, see also the Xero Leave Mapping section on the Leave Management page.
- For super fund details that sync alongside employee data, see Superannuation.
- For the Integrations tab in context, see Company Settings.